Showing posts with label Computing. Show all posts

Thursday, 19 May 2016

Hack the Teacher - A lesson in physical computing using a Raspberry Pi Zero Christmas Jumper

Just before Christmas I had some fun with a Christmas Jumper and Physical computing based around the (then) new Raspberry Pi Zero. Here is the rather belated write up of the lesson.


I was not quick enough to get hold of a Magpi issue 40 when they were first in the shops so I subscribed and waited for it to be delivered to my door. Initially I didn't really know why I wanted the attached free Raspberry pi Zero, I just knew I wanted one.

The Jumper


However when it arrived inspiration arrived with it and I decided I needed to make a Christmas jumper and that it would be a really good tool to get some of my students interested in programming. I came up with a simple plan of a Christmas tree with some lights and set about creating the base for the project.

This was all going well apart from two factors; I now only had a weekend to complete the project to be able to use the jumper in lessons (before the end of term), and my inability to sew.

Not one to be daunted I found some felt and cut out the basic shapes then had a crash course from my wife on how to attache them using needle and thread. So I eventually (after a late night sewing) managed to attache the tree using a simple running stitch in the centre of the tree and then added blanket stitch around the edge to secure it in place (and add decoration). From a distance the effect was relatively respectable. (if you look closely you can see that the quality of my blanket stitch improves as it goes around)

The second evening I spent setting up the electronics. I played with a couple of different configurations but in the end decided on individually programmable LEDs. Each LED is connected to a separate pin on the Pi Zero and to Ground. This left maximum flexibility in what could be done with the lights.


I had initially thought about hiding all the connections inside the jumper but as I was putting it all together I quite liked the idea of it all being visible. To this end all of the wiring was attached to the front of the jumper and the Pi Zero itself was sewn onto the jumper. I also used a portable USB power supply to allow me to walk around without being tethered to a plug socket.


After getting it all wired up I connected the PiZero up to a monitor and set about creating a test program that would show the lights on the tree working. It could also be used as a starting point for the students to modify the existing code to create their own sequences. To make it a little easier I set up a few functions that set groups of light as on or off and the made a short sequence using the functions. I set this up to start on boot so I could just connect the power and the light sequence would start.


The video shows one of the LEDs had failed but this proved to be a loose wire that was hastily soldered up and everything was up and running.

The Lesson

The idea for a lesson using the jumper was inspired by last years code.org hour of code which had students programming a sequence of lights for Christmas trees outside the Whitehouse.

The plan was to explain how the GPIO library is used to turn the lights on and off and then let the students view the code for the existing sequence before coming up with their own code to control the jumpers LEDs.

Preparation

To allow students access to the PiZero I needed to connect it up to the school network. The plan was to do this over wireless with a USB wireless network adapter. (in reality I had problems getting onto the school WiFi network so I took off the jumper and used a wired adapter instead) The students could then login to the PiZero using SSH and use nano to create their programs.

The students downloaded putty to their workstations in order to do this.

Introduction
Demonstration of the jumper working

Explanation of GPIO Library commands to control the LEDs (including the functions I created earlier)

Main Activity
Students to design an algorithm for the light sequence

Students to use python and the GPIO library to program the sequence - this was done by logging in over SSH using putty and copying the basic file (including the functions and GPIO setup) giving it their own name.

Students test the code on the jumper - this required a bit of co-ordination to ensure we only ran one script at a time.

Extension
Able students create their own functions that they can reuse in their sequence.


Plenary
Demonstration of some of the best (aesthetically) sequences

Discussion about code efficiency and creation of functions to avoid duplication of code


Review

The lesson went well with a good deal of enthusiasm generated by the idea of 'hacking the teacher' the students were initially very overly excited by downloading putty and being able to log in remotely to the Raspberry Pi on my jumper.

The students were fairly quick to be able to get a short piece of code working (mostly just a single flashing LED) and then move on to experimenting with using the functions I had built.

At this stage there was a good deal of discussion about what they could do that would be amusing (fortunately I had thought of this at the design stage and I think I managed to avoid any embarrassing light combinations of a phallic nature, or at least they didn't find any during the lesson). Once they had discovered they could not create anything rude they settled for pretty and started to compete on who could create the best sequence.

There was lots of experimentation of how fast they could get lights to flash or change and with what sort of changes looked good. Some of this was a little held up by the fact that there was only one jumper so students occasionally had to wait for someone else to test their code before they could run theirs. It might have been good to have some breadboard prototypes for testing to reduce some of the waiting but i feel that that may have spoiled the interest provided by making the code run on my jumper. This would have been even better if we could have got on over wireless and I could have been walking around the room whilst they were testing their code on me but this was a small niggle.

Overall the lesson was a great success with students engaged in creating code and experimenting to see what they could do as they learnt more about how the Library worked. There were some great creative responses and some good use of functions with parameters for time that could be reused at different points in the code.

If i did this again with another class I would probably use the GPIO Zero library to reduce the code required to get things working but with students staring by using my example code they had a reasonable start anyway.


The rest of the day as I walked around school I did spend alot of time assuring students (and some staff) that "No it's not a bomb" (it was just after Ahmed's clock incident) and "No I won't catch fire". However I did get several question about how it was made and could they make one too, so hopefully some more students aware of the possibilities of computing.

Wednesday, 13 January 2016

GPIO Zero - making coding less language intensive.


In a previous post Getting Physical with Python I wrote about the difficulty some of the younger children in my computing group had with the volume of typing required to get started with physical computing. They did not struggle with understanding but it took too much time and help to enter the volume of text required. This took away some of the excitement and slowed things down.

At the time I thought to speed this up it would be good to write a python library to reduce the amount of text needed to get things to happen. Unfortunately I had lots of other things to do and this never went anywhere. However someone else also thought it would be good to make it easy to get started with physical computing and was able to do something about it.

That person was Ben Nuttall of the Raspberry Pi Foundation. Along with Martin O'Hanlon and Dave Jones he has created GPIO Zero. You can read his account of how it happened on his blog.

This python library can be used to very simply control components using the GPIO pins. The initial function set is based around the popular CamJam EduKits  (Kit 1- Starter, Kit 2 - Sensors) and makes a great starting point for physical computing using python.

A simple light and button combination can be controlled with the below example:

from gpiozero import LED, Button led = LED(15) button = Button(14) button.when_pressed = led.on button.when_released = led.off

instead of something like this:

import os 
import time  
import RPi.GPIO as GPIO

GPIO.setmode(GPIO.BCM) 
GPIO.setwarnings(False) 


GPIO.setup(14, GPIO.IN)
GPIO.setup(15, GPIO.OUT) 

while True: 
        if GPIO.input(14) == False: 
              GPIO.output(15, HIGH)   
        else: 
               GPIO.output(15, LOW)  

 time.sleep(0.5) 

The reduction in volume of code and setup required is brilliant. GPIO Zero is an amazing tool for education. This is especially true where the volume of text entry is a barrier (either with younger or SEN children).

The tool allows the focus to be on the programming concepts and not on the entry of text. When i worked with my HomeEd computing group there was a difficulty fro a number of the students (aged between 5 and 15) in using the GPIO library as there was a lot of code to enter. They were generally happy with what they were trying to achieve but found that it took a long time to enter the lines of code required just to light up the LEDs.

This meant that in the one hour session that is what we achieved, lighting up the LEDs. Whilst this was a success and the children were happy with getting there it would have been much better to spend more of the time in the session exploring what could be done rather than entering lots of text.

GPIO Zero takes away some of the burden allowing children to focus on what they are trying to achieve rather than on copying out lots of lines of code (especially the set up parts that are conceptually more difficult to grasp and result in questions about what is BCM etc).

I have found that where I have used this it has meant I can more on more quickly and cover more of the computational thinking ideas where previously there would have been more time waiting for the students to catch up with the typing required. It also works well to satiate the desire for instant gratification that appears to be fairly common among my pupils. They only have to spend a short time entering code before they can see a result.

It is also much easier in a classroom to debug the code they have written if there are errors. The reduced volume of code makes for less searching to find the capitol that should't be there. This make students more able to do it themselves or makes it quicker for me when they can't see what is wrong. The reduction in time taken here give me the opportunity to get to more pupils and help them to progress.


I have also used this at home with my son (8) whilst he has been creating a robot using the CamJam EduKit 3 - Robots. This was really powerful because it allowed him to achieve results in short pockets of time before he lost focus and wanted to move on. He used the provided worksheets to set up the robot and connect the components and I translated the code parts into GPIO Zero for him to get the robot working.

So in summary the feedback is - Thanks Ben this is an awesome tool to help me teach computing.

If you are interested in using GPIO Zero there is a great getting started guide on the Raspberry Pi website in the resources 'Learn' Section.

More information can be found on pythonhosted.org or on GitHub. There is also a Google Doc with information and a place to add comments / requests.

Tuesday, 22 September 2015

Acting the Part - A lesson in processor architecture

Part of the syllabus for my A-level computing group (OCR A Level) is to learn about and understand the make up of a CPU. This goes beyond the basic "this is the brains of a computer" and starts to look at how the CPU does it's job and which parts of the CPU do each part of the job.

To do this I could have done a 'chalk and talk' lesson telling the students all about the functions but I felt they would learn better if i could get them more involved. I also wanted to get them interacting and working together.

I did a lesson before with my Home Education group based on a CS unplugged activity - class simulation of a computer. I had adapted the ideas on the page to make a human calculator program using children to move the information around the parts of the computer. this was a little basic but it seemed like a good basis to expand on for my lesson.

As this was an A-Level group I wanted to get the students to do the thinking. So i came up with a plan based on a simple introduction to the parts and functions then set the students the task of designing activities to explain the working of the CPU to their classmates.

For the introduction we did a revision of the fetch-execute cycle and then went smaller to look at the parts of the CPU and what part they play in the process. The students were also given access to a YouTube playlist of videos about processor architecture to help them research the topic.

The students were split into small groups then set the task to design an activity to explain the process to their peers.

The Groups came up with a variety of ways of delivering the idea. All of the groups had an activity which showed they understood the process. The best group came up with an activity that involved the other students to take the role of each of the components and memory.

Their activity is detailed below (with a little editing):

Equipment:
Pens
Plain paper
Whiteboard pens
Mini Whiteboards
Labels for each of the components (can be written on the boards)

Set up:
1) Write a simple program to be used by the simulated computer the students used the following program:

     1 Load 70
     2 Add 71
     3 Store 72
     (at location 70 they had 712, at location 71 they had 73)

2) Select students to take the following roles -

     Registers:
     Program control - PC
     Memory Address Register - MAR
     Memory Data Register - MDR
     Current Instruction Register - CIR

     Arithmetic Logic Unit - ALU
     Control Unit - CU
     Accumulator - AC

     Cache Memory

     Address Bus
     Data Bus
     Control Bus

3) Hand each student the correct label, a whiteboard whiteboard pen, paper, and pen then position them around the classroom. Ensure the registers are together and the other components are spaced out around the room.

4) Hand Memory the Program and data loaded into memory


Activity

The students then act the parts of the CPU to carry out the program. To pass data / instructions / control around they write the information on to paper screw it into a ball and throw it to the next part in the process.

So for this example program the following happens:

1) PC is set at 1. This is transferred to the MAR (by throwing paper).
2) CU requests contents of address 1 from memory. (throwing paper via the address bus)
3) The data in the memory (LOAD 71) at address 1 is transferred to the MDR (via the data bus)
4) Contents of MDR loaded into the CIR
5) Contents of CIR sent to CU to be decoded (Data bus)
6) CU decodes the instruction and sends the required address to the MDR and increments the PC. (control bus)
7) Control signal sent (control bus) to fetch the data at the new address (70) (address bus)
8) Data from memory address 70  (712 ) loaded into the MDR (via the data bus)
9) Data from MDR (712) sent to the AC as required by the Load command


10......

this continues carrying out each instruction from the program so for this program PC 2 loads the Add 72 command which fetches the data from location 72 (73) and adds it to the AC. To add the two numbers the ALU is used. The total is added to the AC then the next instruction followed which in this case stores the result at memory location 72.


This could also be extended to show the extra time required to fetch data / instruction from RAM if they are not in cache memory. To do this the RAM should be positioned further away than cache memory. The cache is checked first then the RAM queried if it is not there.

Saturday, 28 March 2015

Getting Physical with Python

This session with my HomeEd group I introduced some physical computing using the CamJam Edu kit .

Last time I blogged about the challenge of teaching a group with my own children (who are not used to a classroom environment). This week I had the additional challenge of my normal child swap falling through so I ended up with 3 of my own children to contend with.

With this in mind my plan was for more independent work with some supporting materials to make it easier for the children to work without my direction all of the time.

I also planned to manage the situation by placing my offspring carefully either side of me in the room so I could switch between the instruction and paying them attention. This worked much better for me to be able to manage the session. Although at one stage it did mean carrying 2 of my children whilst trying to explain things on the board (using my daughter to point out the relevant bits whilst I talked).

I had decided that I did not want to over simplify things for the children by using scratch. We had also been mainly working at the command line so it made sense to progress with this and use nano to create python files to control the components. This also followed the CamJam worksheets so I could use those to provide additional guidance so the children could refer back to the instructions.

As the group is very mixed (5-15) there was a range of experience in the group but most had not used electrical components in a breadboard before. After a quick introduction they were all setting up the simple LED and resistor circuits.

Most of the group managed to get as far as getting the lights lit but it did take some time to get there. The real limiting factor I found with using python with the younger children was the speed they were able to type the code was very slow compared to the older students (as they are still working on their reading skills this is actually quite a hard task).

There was no apparent problem understanding the concepts and adding text to control things, but the amount of text that needed reading and adding to the code was a problem. To make it easier for these younger students (and any students who find reading / typing difficult) it would be useful to reduce the volume of typing that is required to produce a result.

That said nearly all of the children had at least lit the LEDs by the end of the session even if this had involved a bit of help with typing from the adults in the room.


Wednesday, 25 March 2015

Raspberry PI Set up and Hello World

Having introduced the basics of computing this week the plan was to get the children setting up the Raspberry Pi and starting to program.

There was a little setup confusion with the venue meaning that there was a delay getting everything out and a much less ordered start to the session as kit was quickly located and brought out to us. We also discovered that the table arrangement we were using did not allow for enough power outlets to be available. A swift rearrangement of table and we had everyone near enough to a plug or extension to get running.

This was a completely new experience for me as I am used to arriving in my classroom that has all of the kit stuck on tables ready for me when I arrive and just moving cables around between the desktop and the Raspberry Pi. With the help of Jeremy (one of the other parents with an IT background) and Hamish from the University of Sheffield (who had come to see the Pi Bank kits in action) the children were all eventually up and running.

After the kit arrived we had to tackle the normal issue of setup with failed memory cards and trying to sort out which display option would work best. This was where the Pi Bank kits really helped. The range of connection options included meant that even with a collection of different monitors of differing ages we were able to get all the children connected and logging in.

It was at some point during the effort to help all of the children that I was shown the possible horror of teaching my own children. As a Home Educator I spend a large amount of time teaching my own children but not normally in a large room with other children to share the attention.

I think the sharing of my attention is something that will remain a challenge for my children to get used to and for me to work around, I need to find a way to channel my children's natural desire for my attention in a way that does not affect the groups progress.

Despite these distractions and the issues with the equipment we did manage to get everyone logged in to the Raspberry Pi. In fact we managed to move on and get the children started with looking at the file system and starting to create basic programs. The children used `ls` to look at the files and folders then `mkdir` to make their own folders. We then had a go at the traditional "Hello World" program in python using nano. Some even managed get the program prompting for user input.

Overall we managed to achieve the objectives even if it was not as calm and organised as I would have liked. However comparing this with the setup lessons I have taught in school is a favorable comparison,  We normally teach this in Y8 (12/13 year olds) and I find that normally I can expect to only get the class as far as making their own folders then needing to pack up the kit. This is with all the extra parts all setup on desks. With our mixed ability and age group we have been able to progress to making a simple program. With some tweaks to the organisation and a reduction in distractions i am expecting the group to progress fairly quickly.

To this end I have changed the setup plan for next week and the tables should be arranged near to the power outlet and the venue have promised to have the monitors, keyboards and mice setup and waiting for us. This should allow us to get started more quickly and move on to the physical computing experiments I have planned. I have also purchased and burned a fresh set of SD cards that I will be assigning to the children to use and save their work on each week.

Friday, 13 March 2015

Basic Computing for Sheffield Home Educators

I have been talking for some time about starting a Computing / STEM group for home educated children in Sheffield.

We home educate our 7 year old son and there is a large community of home educators around Sheffield. As computing can be quite equipment heavy it is not something that is easy to do at home and until now there hasn't been an alternative.

The difficulty was finding a venue and some equipment that I could use to run the sessions. Fortunately I had seen a post about a lending library of Raspberry Pi equipment that had been set up at Sheffield University - The Pi bank. Fortune was smiling on me as this also led to the rediscovery of the Access Space. They charge for the space but they have an ideal flexible teaching space ideal for this sort of group. A few phone calls, Facebook posts and  emails later and the group was all set


The group is a very mixed group with children raging from 5 to 15 with a different levels of prior knowledge of computers and programming. This presented a different challenge to my normal classes but makes for interesting class dynamic. I say class but the plan is to try and not be too school like and see how we can follow the children's interests as we progress. We have a few structured 'lesson' type activities planned but after that I am hoping to split the group down and work on projects that they are interested in.

Today I ran the first ever session with a focus on how computers work and an introduction to algorithms.

First we made a human computer with the children forming the components and passing information around the computer to first perform simple sums.

The children took on roles with one student acting out each part of the computer and several (the more active and excitable younger boy mainly) passing the information between the components.

The user, although not too keen to hold on to the human mouse moved the mouse around our ( A4 paper calculator display) and the mouse driver reported the position. This was passed to the processor stored in memory and also displayed on the monitor (children with with pencil and paper and whiteboard and maker respectively).

This was repeated for each of the movements of the mouse to complete the sum. I had planned on simple single digit arithmetic for our volunteer processor but the user had other plans (I did managed to keep it to 2 digits, but I think she would have gone for more if left to her own devices). The processor then calculated the answer and passed that to the monitor and memory. In this case the user forgot to save (or i forgot to ask her to) so we talked about what would happen to the information and then pretended we had saved to pass the information to the hard drive (child with paper and a pen).

After that we simplified our computer, using just a camera/computer combination, lots of willing active information conduits and a rather excitable printer (my Son Toby) we experimented with how computers see and describe images using binary. To keep things simple we used a simple 1 bit black and white image which was only shown t the camera. The camera passed the appropriate 1 or 0 (each an A4 sheet with 1 on the front and black on the back or 0 with white on the back) to the information carriers and the printer started to put the image together on the floor.

This was really great as the first stages were rendered accurately but as the information carriers gained confidence and enthusiasm we started to see some arriving out of order which corrupted our image slightly. This gave us an opportunity to talk about the importance of the data arriving in the correct order.

After getting everyone sat down again I introduced our next activity which was the Sandwich making robot by Philip Bagge. I explained the activity and handed out the sheets to allow the children to plan their Sandwich making algorithms.

After donning the special robot uniform (pink pinny borrowed from home) i took on the role of robot and we tested some algorithms. We didn't get as far as a full sandwich but we learnt some good lessons about how to think through a problem. We also took the opportunity to talk about debugging.

I was surprised by how many children though that cutting the bread bag was the way to open bread until at the end someone mentioned there was no open on the instruction set. I thought this was an error until I watched the videos again and noticed that Phil starts with his bread bag open.

Overall I am quite happy with how the session went and the children seemed for the most part engaged in the activities. I now need to go off and plan for next weeks introduction to Raspberry Pi and programming in python.


Thank you to Computer Science Unplugged and Philip Bagge for the inspiration for the activities for the session.

This is Phil in action -


Outtakes - https://www.youtube.com/watch?v=leBEFaVHllE - very good lessons on how important it is to get the algorithm correct.

Friday, 19 December 2014

The first rule of computing club........

....................don't talk about computing club


It struck me today that my computing club is made up almost entirely of girls. It also occurred to me that I hadn't ever publicly called it computing club.

I started the group to work up some entries for the Sonic Pi space music competition. A small group of students (10) arrived the first week and I showed them how to set up the Raspberry Pi and gave them a quick introduction to the Sonic Pi interface. Before long they were producing basic tunes and adding loops.

The group has since grown to around 15 regularly attending students and they are all engaging in coding pieces of music for the competition. It was not until I was looking through the list that I realised quite how many girls I had ended up with. out of the 15 I only have 3 boys who regularly attend (compared with our scratch games club that is entirely boys).

I have worked before with groups of students using Sonic Pi and found that it is great for engaging all students (not mainly the boys like a lot of the robotics work I have done) but this was something different as none of the students had used Sonic Pi before.

This was a marketing issue!

I sent round the poster along with a note to all of the Y7-9 classes asking for anyone who wanted to try making music with the Raspberry Pi, no previous experience necessary. There was no mention of computing, coding, or programming.

The response was all from students who were interested in making music rather than those interested in programming. They now all know (not that it was a big secret really) that to make the music they are coding, but they are making music. This appears to be a difference in the approach to what they are doing and has affected how they are engaged with something new. They are not intrinsically interested in the method of making the computer do something, they are interested in the end result (in this case music).

I now have a predominantly female group of programmers all engaged in coding. Once we have finished working on the music competition I am going to be looking for ways to maintain this engagement using the output as the motivator and the coding as the 'what you have to do to get there' bit.

Wednesday, 19 November 2014

Raspberry Pi CPD in Sheffield


Part of the idea of Picademy was that delegates would go out and spread the word. So as part of my effort I spent this evening delivering Raspberry Pi CPD to the Sheffield CAS hub at Sheffield Hallam University.

The session was mainly made up of Computing ITT students from Sheffield Hallam University so it was really interesting to see a different approach to new information (from my secondary pupils). Most of the delegates had little or no exposure but there were two who had used the Pi for their own projects (a security camera and a remote media center).

After a quick introduction to the Pi we spent time describing how the Pi could be set up in classrooms and introduced the Raspberry Pi foundation's resources. Preparing for this event gave me the chance to look again at what is provided and the resources there really do give all the information that you need to get started using the Raspberry Pi and moving on to using it productively in the classroom.

After the set up and a brief summary of some of activities available for using the Pi in the classroom I spent some time focusing on some of my favorite schemes. as a parent of a 7 year old I can't avoid minecraft at home and have found that it is equally as engaging for secondary pupils. I shared some of Craig Richardson's resources from his blog on Minecraft Pi - Arghbox. the delegates were also given a chance to try out some of the scripts on the Pi's they had set up. This may have been a mistake with some of the more game obsessed ITT students (mainly male). This was hastily used to point out the importance of choosing classes and classroom management strategy carefully when using a game students are already familiar with.

We then looked at some of the other ideas I have used in the classroom. The use of Sonic Pi (paticularly as an application that appears to appeal more equally to both genders) to engage students creativity and teach programming in a fun way. We also looked at the possibilities using the GPIO pins for physical computing. I am very interested in 'Personally Meaningful Projects' as a key motivator for students to get involved in programming and the GPIO pins provide this possibility. I shared some example of projects my students and students from further afield have created using the Pi. We also discussed the support available from the community.

The great thing about the ITT students is that once they had a spark of an idea they appeared very enthusiastic to take this on and try using this in their teaching practices. Several were keen to borrow the university Raspberry Pi set and some were talking about purchasing their own and projects they could work on. Hopefully this talk will be converted to action and there will be a few more computing teachers in Sheffield schools enthused about the benefits of using Raspberry Pi in the classroom. If nothing else I did a little Picademy product placement and did my best (if not quite 'The Apprentice' level) pitch for the resources available on the Raspberry Pi site. I left the event feeling buzzy and motivated to do it again so it can't be all bad.

The Prezi I used to as a place holder for the introductory videos and some links for the resources we discussed is here.


As a side / end note this was a chance to play with some presentation tech I can only dream of in my classroom. I had a Pi on one button, the Prezi on another and a visualiser showing the actual Pi on a third. This was the first time I had used the set up at the university and I was very pleased with the possibilities. At the press of a swanky touch screen I could switch between the projected picture of my hands doing magic with the Pi and the actual out put of the Pi, then switch to the diagram on the Prezi showing the possible connections. This made the screen work hard for me and really helped to show what was going on. The only downside was managing multiple mice and a second keyboard a few paces away (due to the university padlocked setup) and talking at the same time. I don't imagine I will be getting this sort of system in my classroom anytime soon but it was good to try it out for an evening.

Monday, 8 September 2014

Conversations with computers using python


I had the idea of making the standard 'Hello World' introduction to programming a new language a little bit more interesting for my Y7 class.

The idea of the computer conversations and the recent Turing test success or (near success) by Eugene gave me the idea of getting the students to make a (vastly simplified) version of Eugene using Python. The plan would be to teach them some basic Python concepts like displaying information and filling variables based on user input and then maybe progress onto selection.

This would initially start as a very simple program with them entering their name and then including the name in the response. The students could then work up some complexity from there using more questions. The next step would be to switch things round and have the computer answer user question based on a list of pre-programmed responses.

The Plan

Introduction

Show the class a video by way of introduction to the test. Something like - Jeremy Clarkson Explains the Turing test or The Turing test, as described by Expect Labs CEO, Timothy Tuttle.

Explain the plan to create a basic chat bot that can have a basic conversation with the user.

Task 1- Hello World

Students to open IDLE and the a new window. They then create a basic 'Hello World' program and save and run.

e.g. 

print ('hello world!') 

Students to experiment changing hello world for whatever greeting they choose. (Yes they will probably make it say rude words!)

Task 2 - Talk to me

Obviously this is a pretty one boring conversation so we need to add in the ability for the user to input information.

e.g.
myName == input('What is your name?')
print ('hello ' + myName)

Students to experiment with this and then try adding more questions.

e.g.
myName == input('What is your name?')
print ('hello ' + myName)
myColour == input('What is your favourite colour?')
print ('That is amazing ' + myName + ', ' + myColour + ' is my favourite colour too')

Task 3 - Selection

To try and make the computer's responses a little more realistic it would be good if the response wasn't the same what ever you type so we can add add selection to change the response based on what is input.

This can start with a simple if else:

e.g.
myColour == input('What is your favourite colour?')
if myColour == 'orange':
    print ('That is amazing ' + myName + ', ' + myColour + ' is my favourite colour too')
else:
    print ('It is nice that you like ' + myColour + myName + ' I prefer orange')

This can then be moved on to add more choice using else if (elif):

e.g.
myColour == input('What is your favourite colour?')
if myColour == 'orange':
    print ('That is amazing ' + myName + ', ' + myColour + ' is my favourite colour too')
elif myColour == 'black':
    print (myName + ' your are strange ' + myColour + ' is not even a real colour, how can it be your favourite?')
else:
    print ('It is nice that you like ' + myColour + myName + ' I prefer orange')

Task 4 - Ask me a question

This basic idea can then be used to switch things around and let the students ask questions. This will only handle a pre-programmed list of questions and answers but completes the very basic conversation idea.

This can be added to the first code or used to start a new program. if in the same program some of the old variables can be used to add more interest.

First the computer needs to prompt the user to ask a question:

myQuestion == input('Ask me a Question?')
if myQuestion == 'how old are you':
    print ('I am 12, how old are you ' + myName + ' ?')
elif myQuestion == 'What is your name?':
    print ('My name is Simon')
else:
    print ('Sorry i didn't understand that question')

Students experiment with their own versions.


This is a fairly simple program so it only has one question opportunity and only a couple of possible questions. If students still have time then they could be challenged to find a way to give more than one question opportunity or add further questions and answers. Another idea is for the students to program a combination of questions for the student and opportunities to answer questions like in a conversation, they could also look at getting the answers from a text file and possibly they could use the text file to allow the program to 'learn' by storing answers given by students to questions and then use those to respond when it is asked that question later!


Plenary

Show some examples of students programs to the class and use them to highlight the key parts of the program.


Further Resources

Since writing this I have found a short scheme of work based on the turning test on the Rapspberry Pi website http://www.raspberrypi.org/learning/turing-test-lessons/. This 3 lesson scheme explains the idea of the Turing test and uses a speech module to have the robot speak to you.


Wednesday, 18 June 2014

Picademy

Two days of CPD is enough to fill most teachers with dread but the Raspberry Pi Foundation is changing all that with its Picademy. Two days of Raspberry Pi training focussed around using the device to it's full potential in the classroom.
 
In April the first Picademy was a great success and the feedback from educators on twitter caught my attention. If you read my first post on this (somewhat neglected) blog you will be aware I had been doing some research into the use of the Raspberry Pi in classrooms. This led me to look for more engaging ways of teaching computing where I could utilise the Pi to it's full extent. I wanted to avoid the replace PowerPoint with Scratch on Raspbery Pi approach and create engaging projects for my students.
 
So where could I go to engage with others and get some inspiration. it was then that #picademy started to appear on twitter. Brilliant, how do I get to go along thought I. Unfortunately the first dates fell over the Easter break and we already had plans. However a series of fortunate events led to a place on the second run. A hastily booked train and hotel later I was off to Cambridge.


We all arrived at Pi Towers not quite knowing what to expect but with high expectations based on what we had seen from the first event.  We were not to be disappointed. After a few housekeeping points we were straight into a day packed full of workshops covering a wide range of activities we could use with students in our classrooms. This included Sonic Pi with Sam Aaron, GPIO with Clive Beale, Minecraft Pi with Craig Richardson and Pi Cam with Ben Nuttall.  There were also sessions on the use of Pi in the classroom using VNC, GitHub and the Raspberry Pi Community. All of the session were led by enthusiastic experts and the content had been backed up with real life experience in classrooms.


These sessions gave a great overview of the varied ways the Pi can be used to engage and enthuse students. I was particularly impressed by the range of ways the Pi can be used to promote the creativity of students.


After a busy day training our minds still buzzing with new information we headed out for the evening meal. This was an amazing opportunity to discuss ideas and network with the other attendees. There were also most of the Pi Towers team on hand to quiz further; how many training providers do you know who are still answering questions at 2130?


The second day started with some inspiring sessions from Eben Upton, Rachel Raynes and  Lance Howarth. A reminder of why the Pi was created and more on creativity.

It was then our turn to get creative in the 'unconference'. The idea being to put to use the inspiration from the first day to practice our skill, create new resources and solve issue we had encountered. In small groups we were able to consolidate what we had seen and further develop our ideas. Some groups worked on teaching resources and others on areas of interest.


Our group worked on a few ideas until we settled on the idea of a quiz bear. This initially involved doing unspeakable things to Babbage to embed the Pi inside with an LED smile and buttons in his ears. Fortunately for Babbage, time was short so a plastic cup made a more easily modified host. We developed the idea to create the idea of a modular scheme of work for Technology and Computing. The main idea being to create the basic elements using recipe cards and combine them together. This would get progressively more complicated and open ended (I will post more about this once we have more to share).


After feverishly working in our groups we all came back together to share what we had produced. Each group or individual shared what they had worked on and/or produced. This ranged from personal development consolidating the skills to imaginative products and schemes of work. One of my favourites was the Micheal Jackson Tribute Glove (#MJTG). This was a development of a previous project by one of the group members and produced a dancing animated MJ on screen controlled by the hand of Dan Aldred.


A short video of the end result can be found here.


After all the sharing we gathered for a presentation of the very shiny Raspberry Pi 'Certified Educator badges'. The course was over but we were all still buzzing; in fact my group continued work on the train home, putting together a plan of action to complete our scheme of work.


This was without doubt the best CPD event that I have attended as a teacher but better than that it has opened my eyes to more of the creative possibilities. I have been a firm advocate of not using technology just for the point of using it and had started work to find ways to really utilise the Pi. Picademy has really helped to firm up this approach in my mind and has really shown me how much value the Raspberry Pi has as a tool to engage students and get them being creative in the classroom.


Much has been made of training the next generation of computer scientists, but without engaging curiosity and promoting creativity then we will only be producing a generation of robotic programmers with no love for the subject. Hopefully #picademy and the Raspberry Pi Certified Educators it has produced will be able to help the Foundation to provide that creativity and inspiration.

Thursday, 20 February 2014

Raspberry Why?

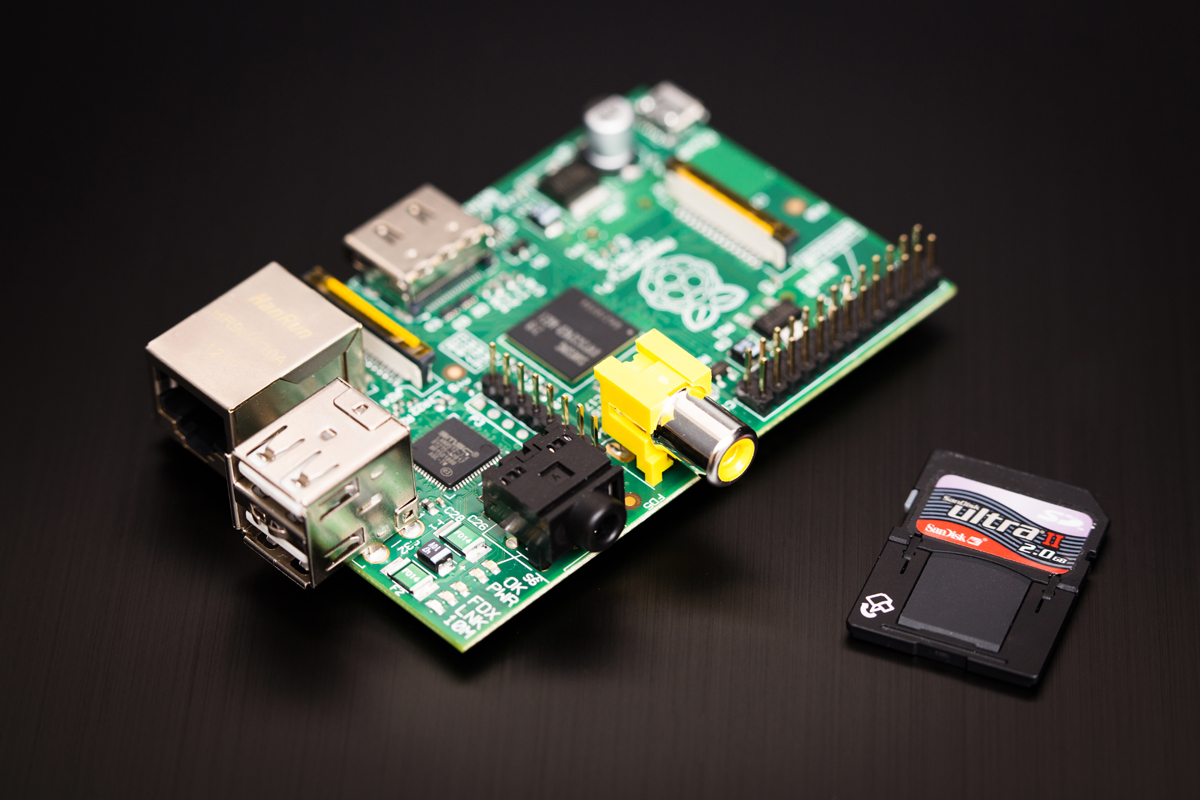
(1)
 
I have heard lots anecdotally about the use of Raspberry Pi in schools and there has been some talk about them “gathering dust in school cupboards”(2). and questioning along the lines of “Do UK schools really need the Raspberry Pi?”(3)In my own experience I have seen schools use them to “do programming” where they could be best to use the suite of 30 PCs they already have.
 
This forced use of technology for the sake of it is neither what the Raspberry Pi was intended for or based on good pedagogy. Eben Upton stated that the idea of starting the Raspberry Pi project was to get more children programming, but this is not how it will happen.
 
His vision was a playground for the children to experiment and even likens the Pi to a child's bike (compared to the family car that is the PC) the Pi is “owned by the child” and “if they break it it's not a disaster, they can walk”.(4) This ownership and experimentation is not the case in a classroom of Pis attached to PCs used to do “some programming”. All this is doing is making it take a little longer to get to the programming bit that they could do more quickly and easily by using the PC they are attached to.
 
This forced usage comes from a well meaning desire to give pupils some exposure to a device that has become a must have in computing education. It is a very admirable thing to be able to expose the young people in our care to a range of different devices, but we should understand fully what we are trying to do with them before running out and buying a class set.
 
This approach seems very common in education and it it is what has led me to create this blog. We see new technology and then try and find a use for it in the classroom. Some of these technologies would be much better not used at all when they are implemented in this way (how many interactive whiteboards in secondary schools are actually used interactively?).
 
For the Raspberry Pi, a device that was designed to engage and interest students in computing is in danger of becoming a tool to do the opposite.(5) Without using these devices to fulfil their potential we are doing our pupils (and the devices) a disservice. we have been presented with an amazing tool and we are wasting it because of a lack of imagination or lack of flexibility in the way we manage the learning process.
 
We should be using these Pi to enable experimentation and self led learning. It should be a tool that allows the students to answer for themselves the “what happens if I...” questions we get asked about computers all of the time. It gives us a platform where students can try things out. They can break things and no one is going to come shouting.
“If Something goes wrong it’s no big deal - you just swap out a new SD card, and your Raspberry Pi is factory-new again” (6)
 
Where the Pi will add most value is where students are able to set the agenda and pursue projects that interest them. A great example of this is Amy Mather(7) who got interested in the Pi and programming after attending events outside of school. She became interested in Conway's Game of Life and programmed a version on her Pi. She went through several versions and eventually added on an external LED display. If we can create an environment in our classrooms that will encourage this kind of exploration then we will be doing things right.
 
The Pi was not designed as a tool to sit in rows in a classroom with. but that doesn't mean we can’t use it effectively in a school. We just need to change our approach. I also recognise that we cannot completely change the paradigm within which we operate.
 
To move to a more productive usage of these devices we need to find ways to help teachers bridge the gap. There are several schemes that aim to do this. One successful scheme is Sonic Pi developed by Dr Sam Aaron. Sonic Pi is an open source programming environment designed to explore and teach programming concepts through the process of creating new sounds.(8) The software comes with a scheme of work that was jointly developed with Carrie Anne Philbin (Teacher, Author (9) and founder of Geek Gurl Diaries) . The Scheme of work is designed around the new Computing PoS and teaches programming concepts in an interesting and engaging way. As an introduction to the Pi it gives students a good grounding on some key programming concepts.
 
If we can take this sort of scheme as a start point then find ways to allow students to experiment with less directed projects then I think we are getting closer to utilising this tool to it’s potential. Where people have allowed this experimentation in schools (mostly as extra curricular activity) there have been some amazing projects. Students have created robots, wearable devices and even sent their creations into space (well nearly).(10)
 
(11)

For me the ultimate utilisation of the PI would be some form of introduction and then cross curricular projects where students can be creative and make things for themselves. It would be even better if students had ownership of the devices and products. We should aim to create a space where students contribute ideas and expertise to their peers, where we could guide and direct rather than dictate we will be able to help to foster pupils natural enthusiasm. We should aim to create mini Raspberry Jams in our classrooms.(12)
 
This approach also meet the demands of the National curriculum, the Computing PoS explicitly mentions undertaking creative projects using a range of devices.(13)
 
As we are limited in our time and resources we need to think about what we can do to make the devices more classroom friendly. There are lots of products available aimed to help us to do this. Teachers worried about the robustness of the devices can find a myriad of cases designed for the Pi. My particular favourite is the Pimoroni Pibow it’s robust construction is ideal for school use. It even comes in a range of colours from Rainbow to Ninja. I especially like the fact that it does not hide the Pi away inside an opaque box.
 
Where we are limited by time we need to look at premade kits to add on to the PI to allow the physical computing elements to be created quickly Products such as Buzz box are the start of these but there is still work to be done. The system allows consists of modules that can be linked together to create a diverse range of products.(14) This modular approach means that devices ranging from a simple calculator to a Robot of physiological monitoring device can be built. These ready made plug and play additions can reduce the time it takes to put together a working prototype, allowing pupils interest to be maintained in the early stages of a project where failure or limited activities can be demotivating.(15)

We don't need to rely on commercial suppliers we can add some structure to give students a little direction. Provide our own kit of parts that they can experiment with until they are ready to fully strike out on their own. We can also look to our colleagues in technology to see how they approach creative "maker" style projects, they have been doing this for years. We should look at what they do best and steal it for use in our classrooms. Even better if we can work with them to collaborate on work building student led projects.
 
Educational suppliers are beginning to catch on to this approach and when visiting the BETT show I found a supplier already offering Raspberry Pi Project kits for use in the classroom. The kits range from breadboards and components to kits with units of work. As more teachers take this approach the range of equipment available to support us will also increase making it an easier path to follow.
 
I think the Raspberry Pi is an awesome piece of hardware. It is already really great used in the hobbyist context where personal interests are pursued. I think it will also be great in the classroom one we get over the “wonder device”  stage where every school has got to have them without a lot of thought on why. We should be looking to see what new technologies can offer educationally rather than looking for places to shoehorn them into lessons just for the sake of it.


References:

(2) Shona Ghosh. "Raspberry Pi "gathering dust" in schools | Education | News | PC Pro." 2014. 15 Jan. 2014          <http://www.pcpro.co.uk/news/education/386302/raspberry-pi-gathering-dust-in-schools>

(3) "Bash Street bytes: Do UK schools really need the Raspberry Pi ..." 2012. 15 Jan. 2014                                    <http://www.theregister.co.uk/2012/11/27/feature_raspberry_pi_in_schools/>

(4) "Bash Street bytes: Do UK schools really need the Raspberry Pi ..." 2012. 15 Jan. 2014                                    <http://www.theregister.co.uk/2012/11/27/feature_raspberry_pi_in_schools/>

(5) "About us | Raspberry Pi." 2012. 15 Jan. 2014 <http://www.raspberrypi.org/about>

(6) Upton, Eben, and Gareth Halfacree. Meet the Raspberry Pi. Wiley. com, 2012.

(7) "Raspberry Jamboree 2013: Amy Mather - Conway's ... - YouTube." 2013. 15 Jan. 2014                                      <http://www.youtube.com/watch?v=a35XINnYFtA>

(8) "Sonic Pi." 2013. 15 Jan. 2014 <http://www.cl.cam.ac.uk/projects/raspberrypi/sonicpi/>

(9) "Adventures in Raspberry Pi: Amazon.co.uk: Carrie Anne Philbin ..." 2013. 18 Jan. 2014                                    <http://www.amazon.co.uk/Adventures-Raspberry-Carrie-Anne-Philbin/dp/1118751256>

(10) "High Altitude Ballooning, sixth-form style | Raspberry Pi." 2013. 16 Jan. 2014                                                    <http://www.raspberrypi.org/archives/4390>


(12) "#RaspberryJam | the global community of events for enthusiasts of ..." 2012. 16 Jan. 2014                                  <http://raspberryjam.org.uk/>

(13) "National curriculum in England: computing programmes of ... - Gov.UK." 2013. 16 Jan. 2014                              <https://www.gov.uk/government/publications/national-curriculum-in-england-computing-programmes-of-study/national-curriculum-in-england-computing-programmes-of-study>

(14) Callaghana, Vic et al. "Putting the Buzz Back into Computer Science Education." Workshop Proceedings of the 9th International Conference on Intelligent Environments 26 Jul. 2013: 454.

(15) Callaghan, Victor. "Buzz-Boarding; practical support for teaching computing based on the internet-of-things." The Higher Education Academy-STEM (2012).

(16) "Raspberry Jamboree 2013 Panel Discussion ... - YouTube." 2013. 15 Jan. 2014 <http://www.youtube.com/watch?v=1cqc0XdYezM>
(6)